Using the QR code to recharge with Wattify
Have you placed a QR code on your charge point? Fine, this is by the way a legal requirement since April 2024 for all (semi)-public charge points, so that besides price transparency also AdHoc charging can be done at a public charge point.
The QR code takes the end user to the mobile web page of the specific charge point, or in case there are only a few charge points to the charging site with the individual charge points on it. This article gives an example of a QR referring to 1 specific charge point.
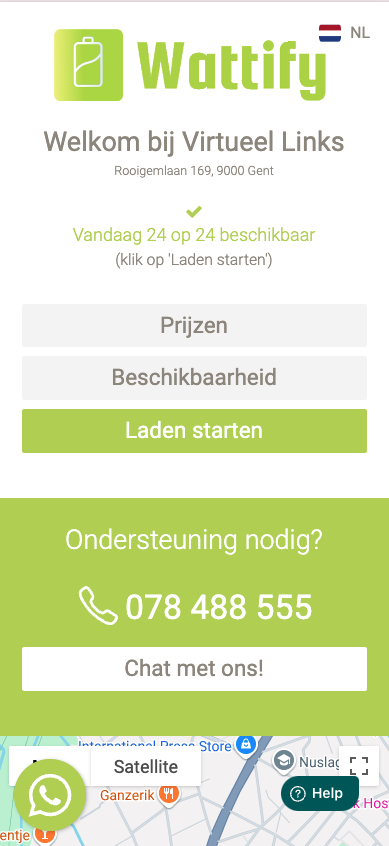
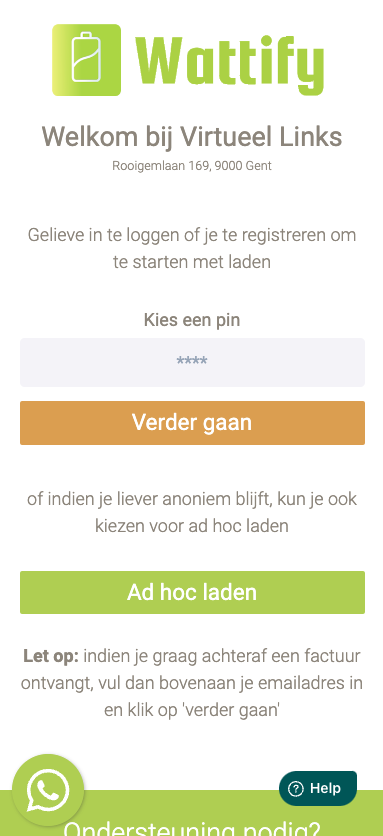
The welcome page looks like this:
Step 1
The price is visible by clicking on prices, the end user price including VAT is listed, any start-up fees and or penalty fees are also listed.
Availability displays the opening hours of the charging station, please note the opening hours will determine when someone can "start" charging, once a charging session is started it can continue charging AFTER the opening hours as well
The last button "Start charging" is only visible if the charge point is actually ready to start charging, i.e. if the cable is connected between the charge point and the car.
Step 2
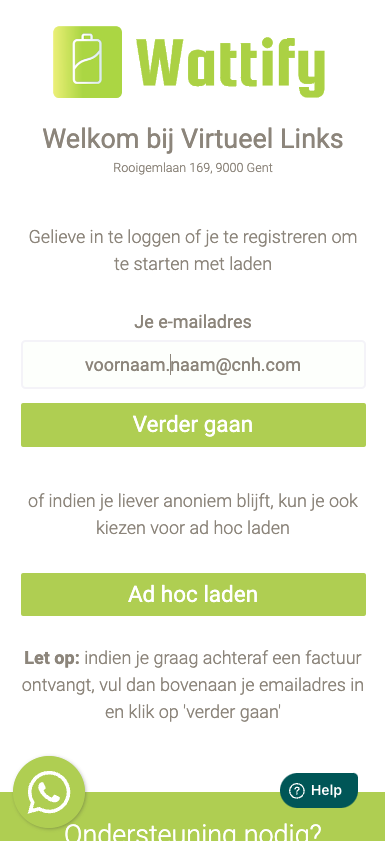
Enter your email address, this will be confirmed again in the next step.
Click on continue.
NOTE: If you click on the Ad Hoc loading button, an account will NOT be created. An amount will be reserved on your payment card later in the wizard and after the loading session, the amount that was effectively loaded will be deducted. The release of the remaining amount may take several days to weeks and is managed entirely by your bank. If you wish to load completely anonymously this is the preferred method, however, we do not recommend this as it does not allow us to invoice you by name afterwards as we handle these loading sessions completely anonymously and thus cannot link them to a person or company.Step 3.
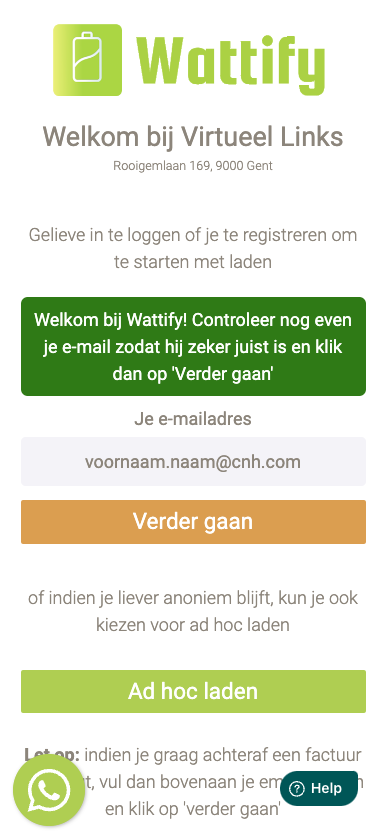
A check on the correctness of the e-mail address
Step 4
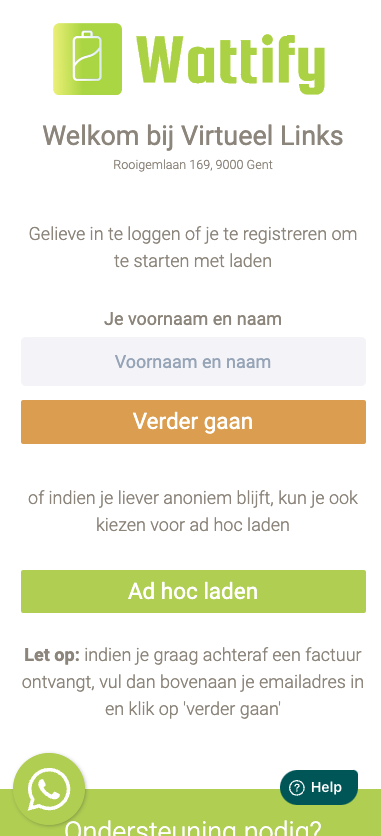
Fill in your name and first name, this will also appear on the invoice later. VAT information and or company information you will be able to complete later after the charging session is complete.
Step 5
In this step you choose a pin code, this consists of numbers only. The purpose of this is to be able to quickly start a charging session later at any other charging station using a 4-digit PIN code combined with your email address.
Step 6
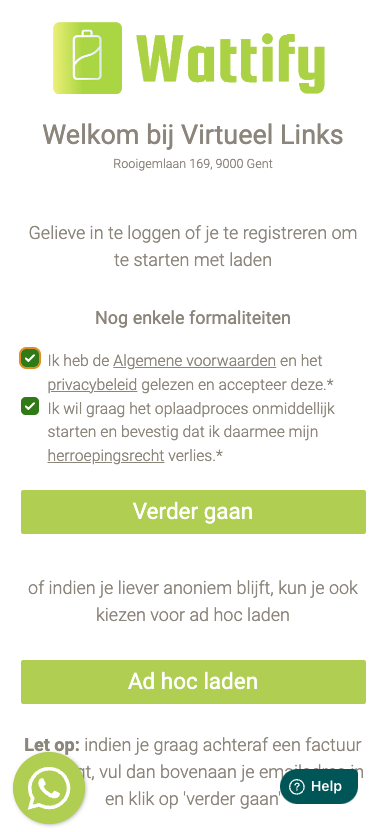
Please confirm here our general terms and conditions and the fact that we immediately deliver electricity that you obviously also lose the right of withdrawal since we cannot take back the delivered electricity.
Step 7
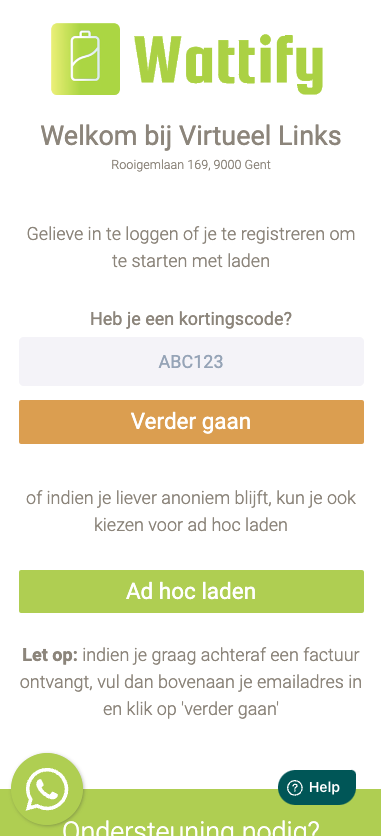
Charging station owners can generate discount codes which then give you a discount on the kWh price, if you have one and the charging station supports this please enter them here, the current charging session will then contain the discount price.
Step 8
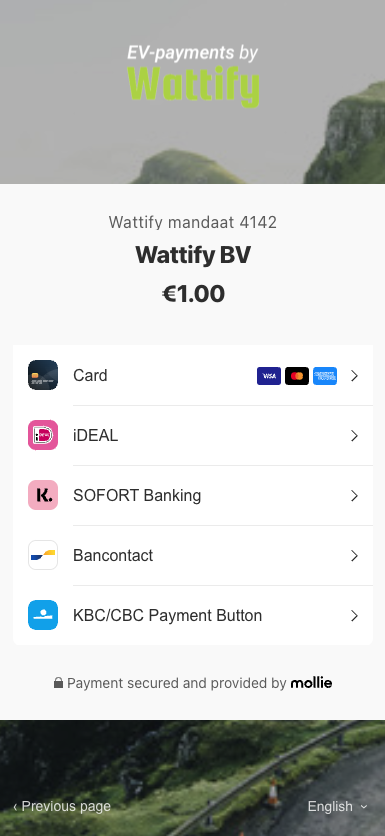
You will be redirected to the mollie payment page. You will be asked for 1 € activation fee. Choose the desired payment method. ATTENTION: On this payment method, you hereby create a mandate, which we will use to charge your loading session. Make sure you use the desired account, we cannot change it afterwards without charging the activation fee again.
After successful payment, the charging session will start immediately. After closing the loading session and disconnecting the vehicle, the settlement will take place and you will also receive a summary by e-mail. In this mail there will be instructions to further complete any billing information.
Related articles
Did this answer your question
Thank you for your feedback
Did not find an answer?
Our team is just an email away and ready to answer your questions